
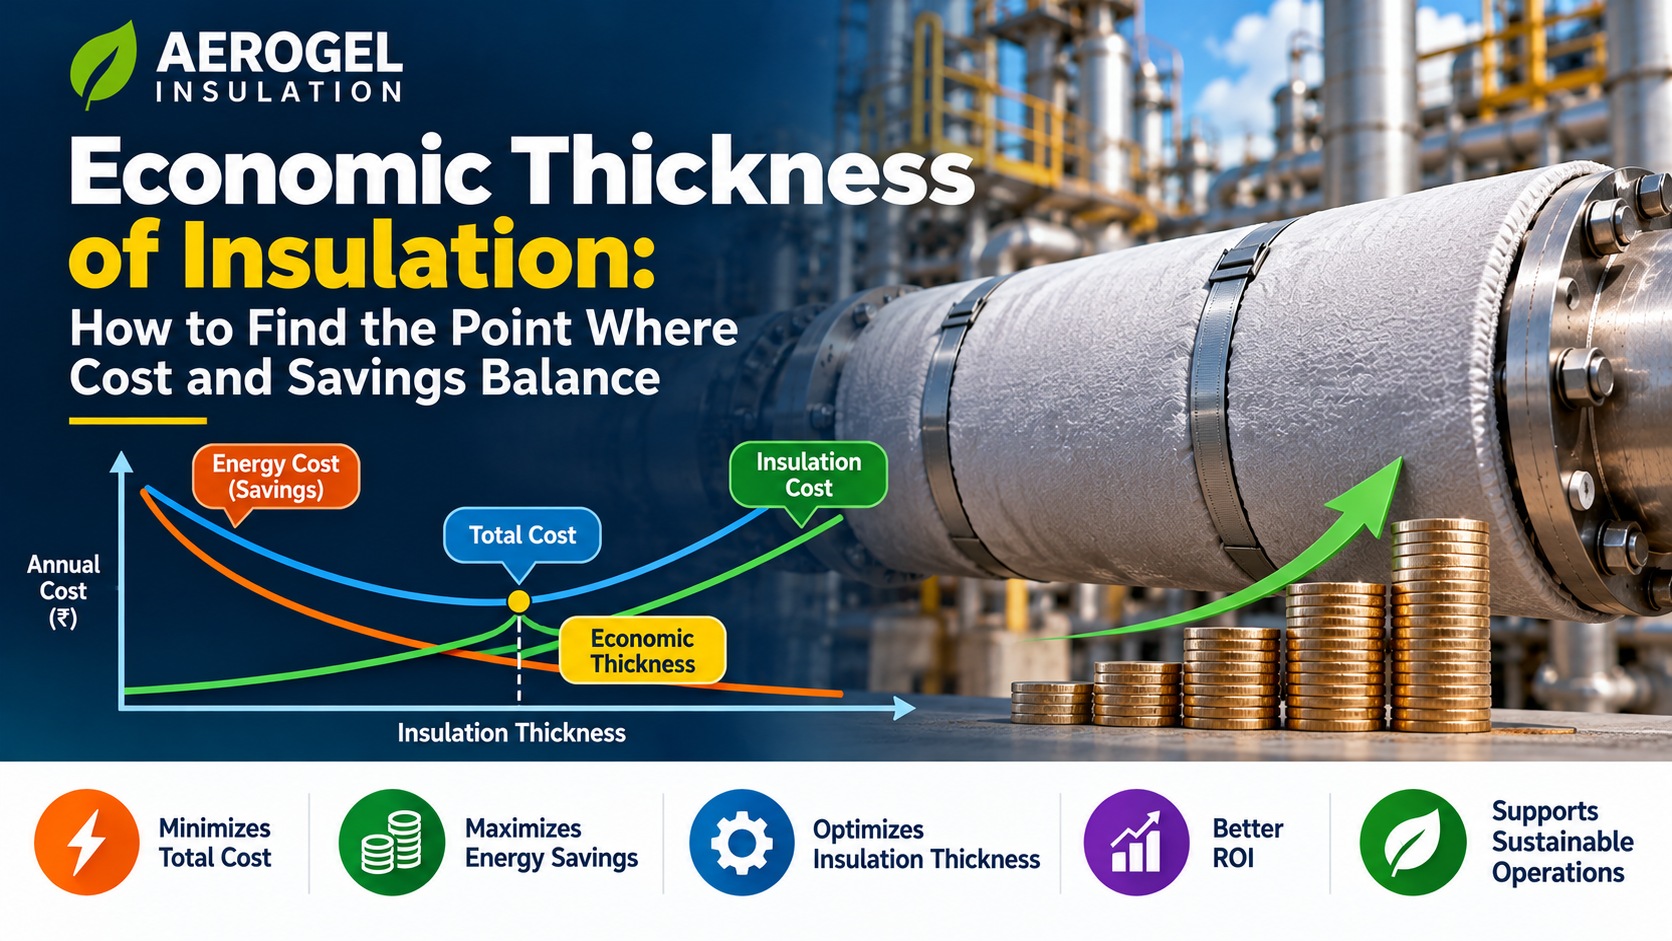
Ask an insulation contractor how thick the insulation on a steam line should be, and you’ll often get a rule of thumb: “50 mm on that size,” “whatever the spec sheet says,” “the same as last time.” Those answers aren’t necessarily wrong, but they skip the actual question. Every extra millimeter of insulation costs money once, and every watt it saves is worth money every hour the line runs. Somewhere between too little and too much, there’s a thickness where the combined cost is lowest. That’s the economic thickness of insulation.
This article explains how economic thickness works, walks through the calculation with a worked example, covers constraints that can override pure economics, and shows how a low-conductivity material such as silica aerogel changes the answer.
The Idea in One Picture
Picture two cost curves plotted against insulation thickness.
The first is the cost of heat lost. With no insulation, it’s very high. It drops steeply with the first few centimeters of insulation, then flattens out, because each additional layer saves less heat than the one before.
The second is the installed cost of insulation, including material, cladding, and labor. It rises more or less steadily with thickness, and on pipes it rises faster than linearly, because each extra layer wraps a larger circumference.
Add the two together, and you get a U-shaped total cost curve. The bottom of that curve is the economic thickness. India’s Bureau of Energy Efficiency (BEE) defines it this way: the thickness at which the combined cost of heat loss and installed insulation is lowest over a given evaluation period.
Below that thickness, you’re paying for wasted heat that cheap extra insulation could have prevented. Above it, you’re paying for insulation whose savings will never cover its cost.
What Goes into the Calculation
The BEE lists the inputs needed to calculate economic thickness. These include fuel cost, annual operating hours, fuel heat content, boiler efficiency, operating surface temperature, pipe diameter or surface thickness, estimated insulation cost, and average still-air ambient temperature.
These fall into three groups.
The physics (surface temperature, pipe size, ambient temperature, and the insulation’s thermal conductivity) determines how much heat each thickness lets through.
The energy economics (fuel cost, fuel heat content, boiler efficiency, and operating hours) turns those watts into money.
The capital side (installed cost per meter or per square meter at each thickness) gives the other half of the trade-off.
To compare a one-time investment with recurring savings, you need one more input: the evaluation period, along with the cost of capital. A common approach is to convert the installed cost into an equivalent annual cost using a capital recovery factor:
CRF = i(1 + i)ⁿ ÷ [(1 + i)ⁿ − 1]
Here, i is the interest or discount rate, and n is the evaluation period in years. For example, at 10% over 10 years,s the CRF is about 0.163, so each ₹100 of installed insulation is treated as roughly ₹16.3 a year. Your finance team will have its own rate and horizon, and the result is sensitive to both.
A Worked Example: Diminishing Returns in Numbers
Take a 4-inch steam line (114.3 mm outside diameter) carrying saturated steam at about 10 barg (around 184 °C), in 30 °C ambient air, running year-round.
Heat loss per meter through cylindrical insulation equals the temperature difference divided by two resistances in series: the insulation layer and the outer-surface film.
Q′ = ΔT ÷ [ ln(r₂/r₁) ÷ (2πλ) + 1 ÷ (2π r₂ h) ]
For illustration, assume conventional fibrous insulation with λ = 0.040 W/m·K at its mean operating temperature and a combined outer-surface coefficient h = 10 W/m²·K. These are assumed values. Real products differ, and you should always use the λ value at your mean temperature.
| Insulation thickness | Heat loss (W/m) | Extra saving from the last 25 mm | Annual heat saved by that step (kWh/m) |
| 25 mm | ~94 | — | — |
| 50 mm | ~58 | ~36 W/m | ~314 |
| 75 mm | ~45 | ~13.5 W/m | ~118 |
| 100 mm | ~37 | ~7.3 W/m | ~64 |
| 125 mm | ~33 | ~4.5 W/m | ~39 |
Calculated values; 8,760 operating hours a year.
Two things stand out.
First, the biggest gain comes from going from bare pipe to any insulation. A bare 4-inch line at this pressure loses roughly 930 W per meter per the DOE, and even 25 mm of insulation brings that down to about 94 W. That matches the DOE’s guidance that insulation typically cuts losses by about 90%.
Second, each additional 25 mm saves much less than the last. Going from 50 to 75 mm saves about 118 kWh of heat per meter per year. Going from 100 to 125 mm saves about 39 kWh, roughly a third as much, while the material and labor for that outer layer cost more than for an inner one because the circumference is larger.
Finding the Balance Point
Economic thickness is found at the margin. For each added layer, compare two numbers.
Annual value of the step = heat saved per year × fuel cost per kWh of fuel ÷ boiler efficiency
Annual cost of the step = extra installed cost of that layer × CRF
If the value exceeds the cost, add the layer. The economic thickness is the last layer where the value still covers the cost.
In the example, at 80% boiler efficiency, the step from 50 to 75 mm saves about 148 kWh of fuel per meter per year, the step from 75 to 100 mm about 80 kWh, and the step from 100 to 125 mm about 49 kWh. Multiply those by your fuel price per kWh, then compare them with your contractor’s price for each additional layer, annualized with the CRF. That gives you the economic thickness for your plant.
The BEE’s simplified procedure works the same way: measure the bare surface temperature, record the pipe dimensions and length, assume an ambient temperature, calculate heat transfer coefficients and resistances, and adjust toward standard commercially available thicknesses. For routine work, the DOE recommends 3E Plus, free software that calculates optimum insulation thickness for many materials and reports simple payback, surface heat loss, and surface temperature for each thickness.
What Moves the Optimum
Economic thickness isn’t a fixed number for a pipe size. It shifts with the inputs.
Higher fuel costs make thicker insulation economic. If you’re using a calculation done years ago at lower fuel prices, the optimum may now be thicker than what’s installed.
More operating hours make thicker insulation economic. A line that runs 8,760 hours a year justifies more insulation than an identical line that runs one shift. Plants that move from single-shift to continuous operation should revisit their insulation.
Hotter service makes thicker insulation economic, because the temperature difference drives every watt of loss.
Cheaper capital and longer evaluation periods make thicker insulation economic. Short payback requirements push toward thinner insulation.
A realistic service life matters. If insulation is likely to be wet, damaged,d or removed during its life, the savings in later years won’t materialize. An economic thickness calculated on ideal performance overstates the case unless the system is designed and maintained to stay dry and intact.
When Economics Isn’t the Limiting Factor
Economic thickness gives the cost-optimal answer, but some constraints can require more insulation regardless of cost.
Personnel protection. ASTM C1055, the standard guide for contact burns from heated surfaces, uses 5 seconds as the probable contact time for industrial situations and recommends limiting injury to a first-degree burn. In practice, many facilities interpret this as keeping touchable surfaces at or below about 60 °C. In the worked example, 25 mm of the conventional material leaves the outer surface at about 48 °C, so economics, not safety, governs here. On hotter lines, smaller-diameter pipes, or low-emissivity metal cladding, the surface temperature can become the governing constraint.
Condensation on cold service. On chilled water, refrigeration, and cryogenic lines, the outer surface must stay above the surrounding air’s dew point. In humid climates,s this condensation limit, not cost, usually sets the minimum thickness, and getting it wrong leads to wet insulation and corrosion.
Process requirements. Some lines must deliver fluid within a narrow temperature band, or limit heat gain or loss over a long run. The thickness then follows from the process, and economics only decides whether to go thicker.
Space. On congested pipe racks, at wall penetrations, in tight equipment layouts, or where adjacent pipes are closely spaced, the economic thickness of a bulky material may simply not fit. Something has to give: either the thickness is cut below the optimum, or a thinner material is used.
How a Low-Conductivity Material Changes the Answer
Each material has its own U-shaped cost curve, so you should optimize material choice and thickness together. Picking a material first, then its economic thickness, can miss the better combination.
Run the same 4-inch steam line with aerogel. DashamLabs’ flexible silica aerogel sheet has a published thermal conductivity range of 0.016–0.030 W/m·K, with the lower end applying near room temperature. Assuming λ = 0.020 W/m·K at this line’s mean temperature (an illustrative value within that range; the actual figure should come from the technical data sheet):
| Aerogel thickness | Heat loss (W/m) | Comparable conventional thickness (λ 0.040) |
| 20 mm | ~59 | ~50 mm (58 W/m) |
| 30 mm | ~44 | ~75 mm (45 W/m) |
| 40 mm | ~35 | ~100 mm (37 W/m) |
At the same heat loss, the aerogel layer is about 60% thinner in this example. DashamLabs rates its sheet as 70% thinner than traditional insulation. The exact figure for any project depends on the material being replaced and on both materials’ conductivity at the operating temperature.
The thickness saving also affects the cost side of the calculation. At 30 mm of aerogel, the finished outer diameter is about 174 mm, compared with about 264 mm for 75 mm of the conventional material. That means about a third less cladding area per meter, less weatherproofing, and a smaller footprint on the rack.
Aerogel material costs more per square meter than conventional fibrous insulation, so it doesn’t automatically win on cost. To compare fairly:
- Calculate each material’s full cost curve, including cladding, accessories and labor.
- Find the minimum total cost for each material.
- Compare those minimums, not cost per square metre and not thickness.
Then check which option actually fits the available space. Where space doesn’t limit the design, a conventional material at its economic thickness is often the lower-cost choice. Where space does limit the design, or where a long service life without moisture damage changes the savings over time, a thin, hydrophobic aerogel layer can reach a lower real-world total cost. Hybrid builds, with aerogel where space is tight and conventional insulation elsewhere, can combine the advantages of both. For more on this approach, see our article on hybrid insulation systems.
A Practical Checklist
Before specifying insulation thickness on your next project or retrofit:
- Gather current fuel cost, boiler efficiency and real operating hours for each system, not assumed figures.
- Use thermal conductivity at the insulation’s mean operating temperature, from the manufacturer’s temperature-dependent data.
- Get installed cost parameters for each candidate thickness, including cladding and labor.
- Agree the discount rate and evaluation period with finance before running the calculation.
- Find the economic thickness by marginal analysis or with a tool such as 3E Plus.
- Check the result against surface temperature limits, condensation limits, process requirements, and available space, and increase the thickness or change the material where a constraint governs.
- Revisit the calculation when fuel prices or operating patterns change significantly.
The Bottom Line
Economic thickness is the point where one more layer of insulation would cost more than it saves. It depends on fuel cost, operating hours, temperature, and capital cost, so it changes from plant to plant and over time. Most savings come from the first layer, and returns diminish quickly after that, but the optimum is usually thicker than “just enough to cover the pipe.” Safety, condensation, and process limits can require going beyond it. Where space is the binding constraint, a lower-conductivity material lets you reach the economic optimum in a thickness that actually fits.
To compare aerogel against your current specification on a real line, review the DashamLabs technical specifications or request a sample.